

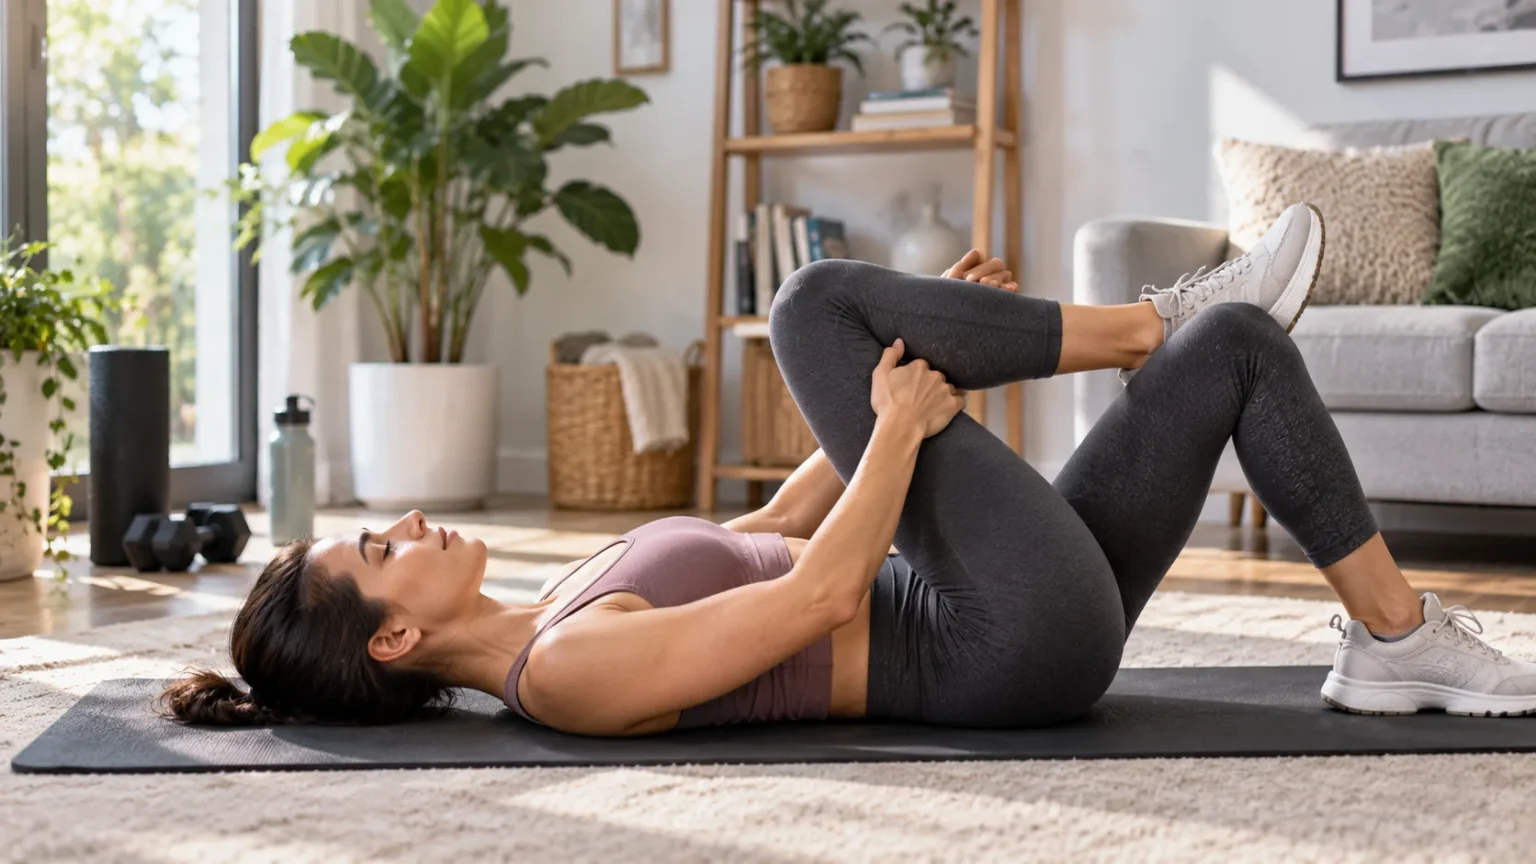

The figure 4 glute stretch is a simple mobility exercise used to stretch the muscles around the hips and buttocks. It gets its name from the shape your legs create during the movement, with one ankle resting across the opposite thigh. The stretch can be performed lying down, seated, or standing depending on your mobility and comfort.
People often use the figure 4 stretch after exercise, prolonged sitting, running, or lower-body strength training. It may help reduce the feeling of tightness around the glutes and improve comfortable hip movement. However, proper positioning matters because forcing the knee or pushing aggressively into the stretch can make the movement uncomfortable rather than helpful.
What Is the Figure 4 Glute Stretch?
The figure 4 glute stretch is a hip mobility exercise that places one leg across the other so the lower body resembles the number four. This position creates a stretch through parts of the gluteal muscles and surrounding hip tissues. The intensity can be adjusted depending on how close you bring the legs toward your body.
The stretch primarily targets the gluteal region, particularly muscles involved in hip rotation and stability. People may also feel gentle tension through the outer hip. The exact sensation varies according to individual anatomy, hip mobility, muscle stiffness, and the version of the stretch being performed.
One advantage is that the movement requires little or no equipment. You can perform it on the floor, in a chair, or even while standing with support. This makes it easy to include in a warm-up, cool-down, mobility session, or short movement break during the day.
What Muscles Does the Figure 4 Stretch Target?
The figure 4 stretch mainly targets the gluteal muscles around the buttocks and outer hip. The gluteus maximus may contribute to the stretching sensation, while smaller muscles involved in hip rotation can also be affected. Some people feel the stretch more deeply toward the side or back of the hip.
The piriformis is another muscle often associated with this position because it lies deep within the buttock and contributes to hip rotation. However, it is difficult to isolate one muscle completely with a stretch. The movement generally affects several tissues around the hip rather than targeting only one structure.
You may also notice tension through the outer thigh depending on your flexibility and leg position. The goal is not to feel the strongest possible pull. A gentle to moderate stretching sensation in the buttock or outer hip is enough for the exercise to be useful without forcing the joint.
How to Do the Lying Figure 4 Stretch
Lie on your back with both knees bent and your feet resting flat on the floor. Lift one foot and place the ankle across the opposite thigh, just above the knee. Your legs should now create the basic figure 4 position while your head, shoulders, and back remain relaxed.
Reach behind the thigh of the supporting leg and gently draw it toward your chest. As the leg moves closer, you should begin to feel tension through the glute of the crossed leg. Keep the crossed foot relaxed and avoid pushing directly down on the knee with excessive force.
Hold the position while breathing slowly and keeping the upper body relaxed. Release the stretch gradually before changing sides. If reaching behind the thigh is difficult, you can use a towel or strap around the leg rather than pulling your body into an uncomfortable position.
How to Do a Seated Figure 4 Stretch
Sit near the front of a sturdy chair with both feet flat on the floor. Place one ankle across the opposite thigh, keeping the crossed foot relatively relaxed. Allow the knee to move outward naturally without pressing it down with your hand or forcing it toward the floor.
Sit tall through your spine and gently hinge forward from the hips. You should feel a stretch through the buttock or outer hip of the crossed leg. Keep your chest relatively lifted instead of rounding aggressively through the lower back simply to move farther forward.
The seated variation is convenient for people who work at a desk or prefer not to exercise on the floor. It can also be easier to control because the chair provides support. Start with a small forward lean and stop when you reach a comfortable level of tension.
Main Benefits of the Figure 4 Glute Stretch
One of the main benefits is improved comfort around stiff hips after prolonged sitting or activity. The stretch places the hip into a position involving flexion and external rotation, which can feel relieving when the gluteal area feels tight. Regular mobility work may also help make certain daily movements feel easier.
The stretch can also complement lower-body exercise routines. Squats, lunges, running, cycling, and strength training all involve muscles around the hips and glutes. Adding gentle mobility after activity may help reduce the sensation of tightness, although stretching does not replace strength, recovery, or sensible training progression.
Another benefit is convenience. The figure 4 stretch requires no specialized equipment and can be modified for different mobility levels. Because it can be performed lying down, seated, or standing, most people can find a version that fits their environment and current comfort level.
Figure 4 Stretch for Tight Hips
Tight hips can develop after long periods of sitting, repetitive training, or limited movement variety. The figure 4 stretch gives the hip a different position from the one used during sitting and may help reduce the feeling of stiffness. However, hip tightness does not always mean the muscles are physically shortened.
Some people feel tight because the muscles are fatigued, weak, or guarding another sensitive area. In those cases, stretching may provide temporary relief without solving the underlying reason for the tension. Combining mobility work with strengthening and regular movement is often more useful than repeatedly stretching the same area.
If the stretch causes pinching in the front of the hip or sharp discomfort deep inside the joint, reduce the range. You may need a different variation or another type of mobility exercise. Comfort should guide the movement rather than trying to force the knee into a predetermined position.
Figure 4 Stretch and Lower Back Comfort
The hips and lower back work together during walking, sitting, bending, and lifting. When the glutes feel stiff, some people may experience a general sense of tension around the pelvis and lower back. Gentle hip mobility can sometimes make movement feel easier without directly stretching the spine itself.
However, the figure 4 stretch is not a treatment for every type of back pain. Disc problems, nerve irritation, joint issues, and other conditions can create symptoms that require a different approach. Temporary relief from stretching should not be mistaken for proof that tight glutes were the only cause.
People using other symptom-management approaches may combine gentle mobility with tools such as a TENS unit when appropriate. These methods may help with comfort, but strengthening, movement, and proper evaluation remain important when back pain is persistent or repeatedly returns.
Common Figure 4 Stretch Mistakes
A common mistake is pushing the crossed knee downward aggressively. The hip should rotate naturally, and forcing the knee can create unnecessary stress around the joint. Instead, allow gravity and your body position to produce the stretch gradually while keeping the movement comfortable.
Another mistake is rounding the back excessively during the seated version. Leaning farther forward does not necessarily make the stretch better if the movement comes mostly from the spine. Keep the torso controlled and hinge gently from the hips so the tension remains focused around the gluteal region.
Holding your breath can also make stretching feel more uncomfortable. Slow breathing helps you relax and makes it easier to notice whether the intensity is appropriate. If you find yourself bracing or grimacing, reduce the range until you can remain relatively relaxed throughout the hold.
How Long Should You Hold the Stretch?
A gentle hold of around 20 to 30 seconds can be a practical starting point for many people. You can repeat the stretch two or three times on each side depending on how your hips feel. Longer holds are not automatically better if the position becomes uncomfortable or causes numbness.
Beginners may prefer shorter holds while learning the correct position. The sensation should remain steady rather than becoming increasingly painful. If the stretch feels easier after several breaths, you can move slightly deeper, but there is no need to force additional range during every repetition.
Consistency generally matters more than performing one very long stretching session. Including the figure 4 stretch several times per week may feel more useful than occasionally pushing into an intense position. Combine it with strengthening and daily movement rather than treating flexibility as a separate goal.
When Should You Avoid the Figure 4 Stretch?
Avoid forcing the figure 4 stretch if you have a recent hip, knee, or lower-back injury that has not been evaluated. The position places the hip into rotation and flexion, which may irritate certain conditions. Pain during the setup is a sign to stop rather than push through it.
Numbness, tingling, burning, or electric sensations are also different from ordinary muscular stretching. These symptoms may suggest nerve involvement and can sometimes worsen when a stretch is held too aggressively. Reduce the range or stop and seek professional guidance if the symptoms persist.
People recovering from surgery or significant joint problems should follow their clinician’s movement restrictions. A physical therapist can suggest safer alternatives if the standard figure 4 position is not appropriate. Mobility exercises should support recovery rather than conflict with medical precautions or rehabilitation plans.
Best Practices for Using the Figure 4 Stretch
Warm up with a few minutes of easy walking or gentle movement before deeper stretching if your body feels particularly stiff. Warm muscles often tolerate mobility work more comfortably than completely cold tissues. You do not need an intense warm-up, especially when using the stretch during a normal movement break.
Keep both sides in your routine even if one hip feels tighter than the other. It is normal for flexibility to differ slightly between sides, so avoid forcing the stiffer hip to match the more mobile one immediately. Gradual improvement is more useful than trying to create perfect symmetry in one session.
Combine the stretch with hip-strengthening exercises such as bridges, side steps, squats, and controlled single-leg movements when appropriate. Flexible muscles still need strength and control. A balanced routine that includes mobility, resistance training, walking, and recovery usually supports better long-term hip function than stretching alone.
Conclusion
The figure 4 glute stretch is a simple way to create gentle tension through the glutes and outer hip. It can be performed lying down, seated, or standing, making it easy to adapt to different mobility levels. Proper technique focuses on controlled hip positioning rather than aggressively pushing the knee.
The stretch may improve comfort after sitting, exercise, or periods of reduced movement. However, recurring tightness may also involve weakness, training load, or another issue that stretching cannot solve alone. Combining mobility with strengthening and regular movement provides a more balanced approach to hip health.
Stop the stretch if you experience sharp pain, numbness, tingling, or significant joint discomfort. People with recent injuries or medical restrictions should seek professional guidance before using the exercise. When performed comfortably, the figure 4 stretch can be a useful addition to a simple lower-body mobility routine.
FAQs
What does the figure 4 stretch target?
The figure 4 stretch mainly targets the gluteal region and muscles around the outer hip. Many people also feel tension around the deep hip rotators depending on their flexibility and positioning.
How long should I hold a figure 4 stretch?
Around 20 to 30 seconds is a practical starting point for many people. You can repeat the stretch several times as long as the sensation remains comfortable and does not become painful.
Can I do the figure 4 stretch every day?
Gentle daily stretching may be appropriate if it feels comfortable. You do not need to force the stretch or use long holds, and recurring tightness should also be addressed with movement and strengthening.
Why do I feel the figure 4 stretch in my hip?
The position places the hip into flexion and external rotation, which can stretch tissues around the glutes and outer hip. Mild muscular tension is expected, but sharp joint pain is not.
Is the figure 4 stretch good for back pain?
It may feel helpful when hip or glute stiffness contributes to discomfort, but it does not treat every cause of back pain. Persistent or worsening symptoms should be properly evaluated.